
How To Build & Host an Online Course With Squarespace
Sign up for a free Squarespace trial here! #afflink

Why would you want to create your own online course?
For me, that reason is two-fold. First, I get to assist an unlimited amount of people. For example, I can either schedule one-time Squarespace SEO services for clients, and help a few people each month, or I can create a course teaching exactly what I do during that one-time service to get Squarespace websites to Google page 1. People can then invest in the course, learn the techniques themselves or have someone on their team do so, implement onto their site, and accomplish the same end as if they had hired me- only the course is guaranteed availability, and it’s at a lower cost to them. This way allows me to still help people passively, and an unlimited number of people at that!
Secondly, online courses are probably one of the very best ways to establish passive income online. If you have a marketable skill, you can create an online course. Maybe it’s knitting, or perhaps you’re really good at budgeting or dog training, the stock market, cooking, or a more professionally trained skill. No matter what it is, there will will likely be a market out there of people interested in your course.
If your website is on the Squarespace platform, you can even construct and host your online course(s) on your own site; no need to join Teachable or similar platforms and accrue additional fees.
In this article, I want to show you my preferred way for creating and hosting online courses on my own Squarespace website.
Hosting Online Courses on Your Squarespace Website

Step 1 - Develop Your Course Outline
This might go without saying, but the first step when creating an online course is to outline the course itself.
Before moving on to any of the other steps, be sure you have all of your lesson titles arranged in the order you’ll be presenting them in the course. I usually do this using a Google doc in Google Drive.
This does take some time and thought and is one of the more daunting parts of creating an online course, in my opinion.
Creating an outline for our course requires us to get focused and thoughtful about the information we’re planning to teach, the order in which it needs to unfold, and how the course should be organized overall.
I usually outline my courses like this:
Module 1 - <Module Title>
- 1.1 <title of lesson 1 in module 1>
- 1.2 <title of lesson 2 in module 1>- etc.
Module 2 - <Module Title>
- 2.1 <title of lesson 1 in module 2>- 2.2 <title of lesson 3 in module 2>
- 2.3 <title of lesson 3 in module 2>
- and so on…
Module 3 …. and so forth
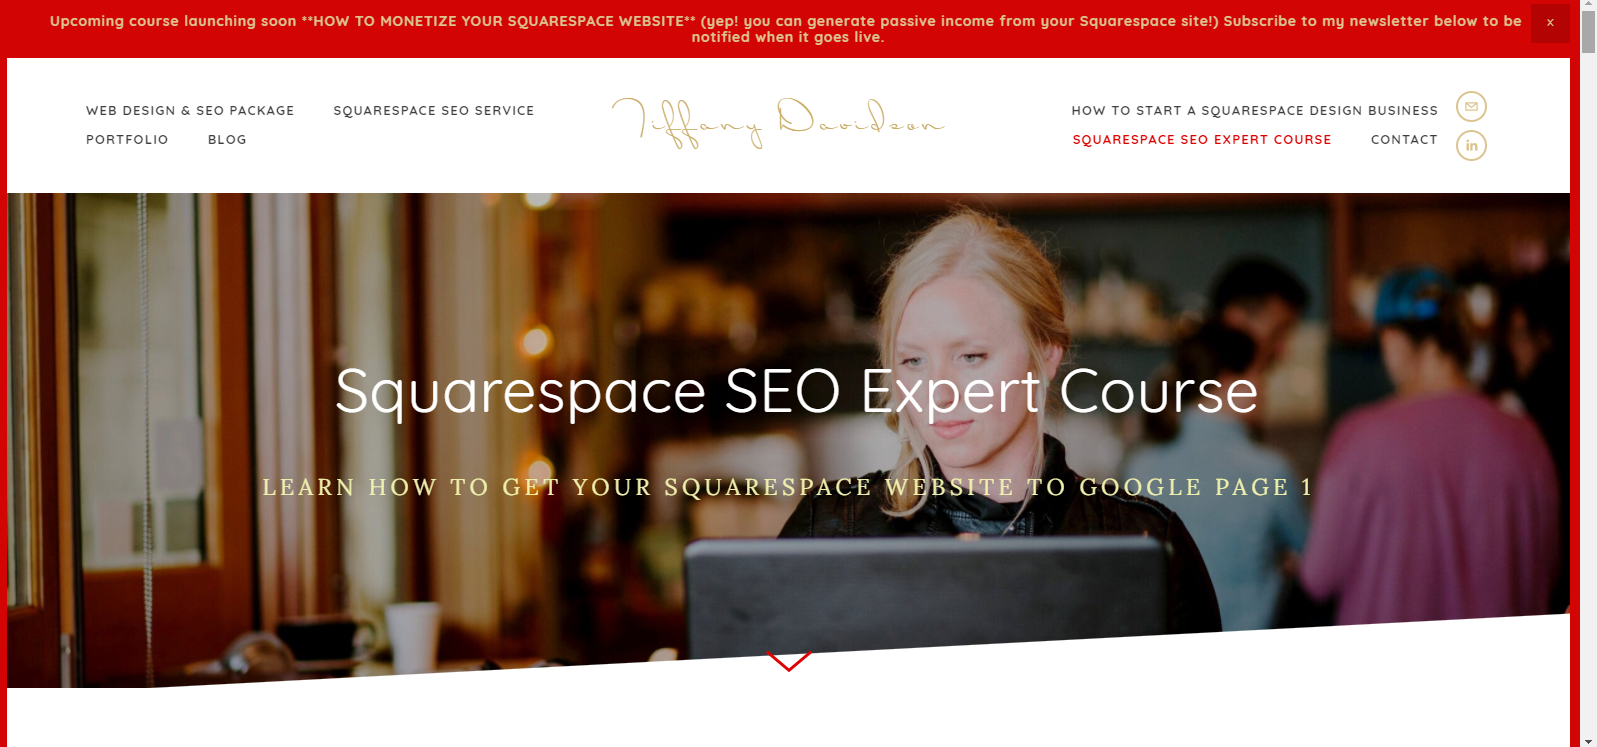
You can see a real example of this type of outline if you look at the course overview on the sales page of my Squarespace SEO Expert course here.
Step 2 - Create a password-protected blog
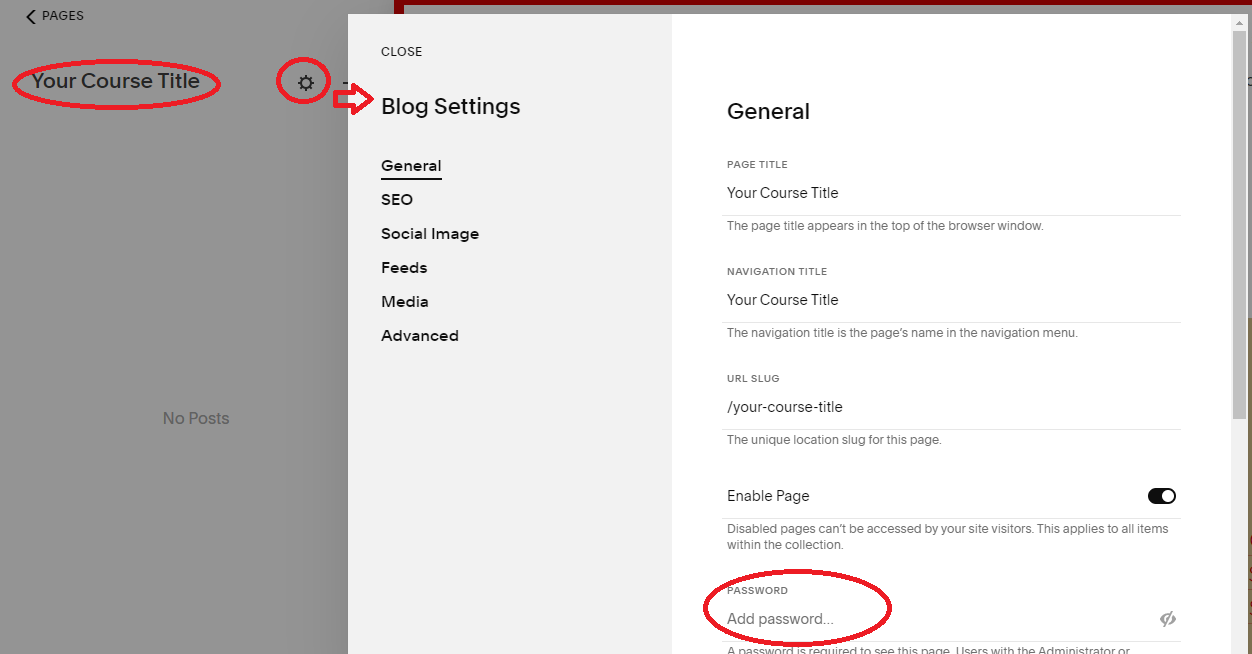
Next, login to your Squarespace site and create a new blog in your Not Linked section.

From there, you can title your new blog with the name of your course, then hit Enter. Next, you’ll click on the little gear icon beside your new blog to get into the Settings panel of the blog. In the Settings panel, you can adjust your page and navigation titles and your URL. You’ll want to keep the page enabled, but add a password. Obviously- make note of the password somewhere so you don’t forget it. You’ll need that later on! Be sure to save your changes there in Blog Settings.
Step 3 - Add lessons as blog posts
Now you can take your course outline from step 1 and use it to create individual blog posts, which will be your lessons.
The important things to remember during this step are:
Put numbers at the front of each lesson (for the sake of organization when using the Archive block). So, rather than titling your first lesson "Welcome” you would want to title it “1.1 Welcome” (or whatever your first lesson is).
Assign a category to each lesson. Each category needs to begin with the number as well, for the sake of ordering the lessons. For example, if your module 1 title is “Introduction” then your category will need to be 1. Introduction. Here’s an example from my Squarespace SEO Expert course:

And very importantly— be sure to adjust the date of each blog post (lesson) so that they show up in the lesson order you desire. I use months apart to give plenty of room to add additional lessons if updates are ever needed in the future.
Set the post you want to be seen first as the most recent date. So if you’re creating your course in October of 2021, your 1.1 Welcome lesson might be set as Oct 1 2021, then lesson 2 would be Sept 1 2021, lesson 3 would be August 1 2021, and so on.
You can change the date of each lesson very easily down in the bottom right-hand corner of the edit window for each blog post by clicking on the underlined date and then adjusting:

Step 4 - Style your course
You’ll want to create a template that’s consistent across all lessons. To do this, just style your blog post template and sidebar like you would a regular blog post. I cover this in my “How to Monetize Your Squarespace Website” course, but this article might also be helpful for this step, as it explains how to create a blog post template and sidebar, which is what you need to do in your course, too.
Along with the above styling, make sure to add a thumbnail image to each blog post to represent your course on the main blog page for your course, in case that page is ever accessed by a student.
When styling your course, you can get as creative as you wish. This is your classroom, after all, and you can decorate the walls how you see fit!
p.s. You can hide your logo and header navigation from the course by using this simple code injection.
Step 5 - Create a lock screen
Anytime you have password-protected pages in Squarespace, you’ll need to design a lock screen.
A lock screen is what the visitor lands on when they try to access a password-protected URL on your site.
It’s basically a login page.
To create a custom lock screen page, from the backend of your site, you’ll go to Settings > Design > Lock Screen. Here is what my current lock screen looks like, to give you an idea:

I keep it simple enough with a large background image and straightforward language. It’s a good idea to include a link to email you in case a student has lost their password. Always good to make things user-friendly!
Delivering your course to customers
After you’ve put in the arduous work of organizing, styling, and creating your online course, you want to be able to sell it right?!
Here’s how I go about turning my course into a product that visitors to my website can purchase:
Create a .pdf file
Create a .pdf file in Canva with the following private information:
the URL for students to access the first lesson of the course (likely your Welcome lesson)
andthe password to access the course
You can do this in a stylish way, using the color theme of your branding or the course imagery, or as simply as you prefer. Here’s the simple .pdf file I deliver upon checkout for one of my courses:

In the actual file that gets delivered to customers, the underlined URL is a clickable link, so they can easily reach Lesson 1.1 Welcome.
Put the course up for sale on your website
Now that you have the .pdf file ready to go, you can add your course as an actual “product” to your website.
(You’ll need a Commerce level subscription to do this, and you’ll need to set up a Shop on your site before adding products.)
From the backend of your site, go to Commerce > Inventory > choose Add Product > choose Digital product > select the shop you want it to go to, if you have multiple > then fill out all the details.
You will upload your .pdf file to the Upload File field, so that it gets automatically delivered to the customer upon successful checkout.
(Tips: Be sure to optimize SEO for the listing. And I recommend adding some screenshots in the photos section, such as shots from the course itself, or testimonials from students as you collect them).
Now that your course is uploaded and for sale on your site, you need to promote it!

Creating a Sales page for your course
Rather than just have your course as a digital product sitting on your website, you need to bring it to the forefront of awareness for anyone who visits your site.
There are several strategies for doing this.
The main strategy to promote your course is to have a designated sales page for it.
For example, my Squarespace SEO Expert course is a product in my Shop, yes, but I also promote it on my homepage, in my blog posts, and it has its own sales page.
The same for my Squarespace Design Business course. Here is its sales page, and I include it in blog posts and on my homepage.
You can use the above examples of my sales pages to create your own if you’d like.
That’s it!
Hopefully now you have an idea of how an online course, capable of generating substantial passive income for you and helping many people, can he built and hosted on your own Squarespace site without having to learn or pay for any external service.
You could also use Squarespace’s new Member Areas to create courses and place them behind a paywall. To learn more about Member Areas, check out this article: Monetize Your Squarespace Site With Member Areas!
Let me know if you have any questions in the comments section below! I’m happy to help.
Thanks for stopping by and I’ll talk to you again soon,
x
Tiffany


Welcome!

Hey there! I’m Tiffany ~ a Squarespace Web Designer & SEO Expert. I design beautiful & professional websites that rank well on Google, & I teach courses on becoming a Squarespace SEO Expert and Starting Your Own Squarespace Design Business!
Feel free to contact me at: tiffany@tiffany-davidson.com
Sign up for a free Squarespace trial here! #afflink
My Squarespace Courses:

Learn how to get your Squarespace website (or any Squarespace website) to Google Page 1 using organic SEO techniques!
As a Squarespace Designer & SEO Expert, I know the methodology for truly getting Squarespace websites to rank on Google Page 1, and I’m going to teach it to you!
This course is a self-guided lifetime-access course, so you can go at your own preferred pace and keep it as a resource to return to time and time again.
Please note: This course was created using Squarespace version 7.0. The same principles will still apply with version 7.1, but the overall user interface will look slightly different. Due to the inherent nature of digital products, refunds are strictly prohibited once purchase has been made. Please also note the course cost is $267 in USD currency.
Learn how to turn your basic design knowledge into a functional and successful business!
In this course, I outline the procedures I use to run my Squarespace design business which continues to grow in revenue every single year and has given me wonderful freedom to not only work from home, but to be able to craft my own schedule. Becoming a Squarespace designer changed my life, and I think during these new times we find ourselves in, where so many businesses are having to transition to the online marketplace in order to stay afloat, becoming a self-employed web designer is a really smart move.
Please note:
This is not a design course. Rather, this course assumes you already possess at least a basic understanding of Squarespace design and need guidance on converting that knowledge into a business.
Due to the inherent nature of digital products, refunds are strictly prohibited once purchase has been made.
The course cost is in USD currency